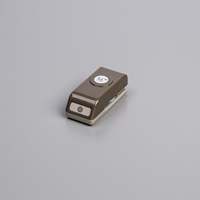
This week I am bringing our weekly deals to you with a new twist. I am including a tutorial that will use at least one of the weekly deal items. This week I am using the 7/8-inch scallop circle punch. It coordinates so great with the Label Love stamp set from page 14 of the annual catalog. I have chose to use So Saffron and Pistachio Pudding - a nice neutral pastel color combo great for celebrating a baby before you know if its a boy or a girl. This tutorial rocks because with it you can save a bundle...
 | |
|
Did I just say bundle? OH, why yes, I did. Did you know that the Label Love stamp set can be purchased as a bundle? You can save 15% buy purchasing the bundle which includes the OTHER coordinating stamp that's not on sale this week. How FREAKIN lucky is that!!!
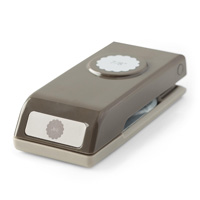
Get the Artisan Label Punch and the Label Love stamp set for only $34.75 Wood (132723) or $28.75 Clear (132722)
The "celebrate" on this card is from the Embellished Events stamp set on page 105 of the annual catalog.
Both Label Love and Embellished Events are great starter stamp sets - click the links to view my pinterest collections for both stamp sets. As you can see, you can create a multitude of cards from Wedding and Birthday to Sympathy and Gift Tags.
Well, on to the tutorial.... enjoy and if you have any questions, please comment this post or email me!
Celebrate Cutest Baby Ever Card
Supplies and Tools
This week's Weekly Deals
- Whisper White 8-1/2X11 Card Stock [100730]
- Label Love Clear-mount Stamp Set [130622]
- Embellished Events Clear-Mount Stamp Set [126497]
- Decorative Label Punch [120907]
- 7/8" Scallop Circle Punch [129404]
- Stamping Sponges [101610]
- Stampin' Trimmer [126889]
- Stampin' Dimensionals [104430]
- Sticky Strip [104294]
- Pistachio Pudding Classic Stampin' Pad [131177]
- Pistachio Pudding 8-1/2" X 11" Cardstock [131294]
- Pistachio Pudding Classic Stampin' Ink Refill [131166]
- So Saffron Classic Stampin' Pad [126957]
- Dazzling Diamonds Glimmer Paper [135315]
Step By Step Directions
1.
Cut Pistachio Pudding cardstock to 4 1/4” x 11,
score at 5 1/2”. Cut one Whisper White cardstock layer to 4” x 5 1/4”. Cut Dazzling Diamonds Glimmer Paper to
three 1/4” strips.
2.
On scrap Whisper White card stock, stamp the
Cutest Baby Ever stamp from Label Love in both Pistachio Pudding and So
Saffron. Punch out the the So Saffron version with the Decorative Label Punch
and the Pistachio Pudding version using the 7/8” scallop circle punch. Layer
the scallop circle punch onto the So Saffron border with a dimensional. Place 3
Dimensionals on the back side of the background layer – do not remove backing
paper at this time.
3.
With a scrap paper on your table surface, use 1/8
of a Stampin Sponge dipped in Pistachio Pudding ink to ink up each of the
Dazzling Diamonds strips. Wipe backs of strips using paper towel to dry. Then
back each one with Sticky Strip.
4.
Starting with one strip at a time, layer three
strips at an angle as shown in card image spacing evenly apart – once sure of
length, trim down, roughly and remove backing paper then adhere each one. Trim
edges to Whisper White layer. Do crossing layer with remaining strips exactly
like the first three strips.
5.
Remove backing from Dimensionals on “Cutest Baby
Ever” punch piece and layer over the crisscross area. Ink up the celebrate stamp from the
Embellished Events stamp set and stamp “celebrate” along the top glittery strip.
Hope you have a lovely Thursday!
Independent Stampin' Up! Demonstrator
wndy26@gmail.com
Disclaimer: I am a new Stampin' Up! demonstrator. I am working on replacing all my craft supplies with only Stampin' Up! product, but I will occasionally use some of my non-SU stash. Bare with me as I work to replenish my stash with only SU product. I will be highlighting new products as they come in and I will always point out great alternatives to my non-SU product that are Stampin' Up!. Thanks for understanding.


